Until now, neither I, Javier, nor the technician we hired have ever had the tool we needed to find out what we need to do to repair the damp problems in the building, and so we have relied on a camera, dimensions, and a notepad.
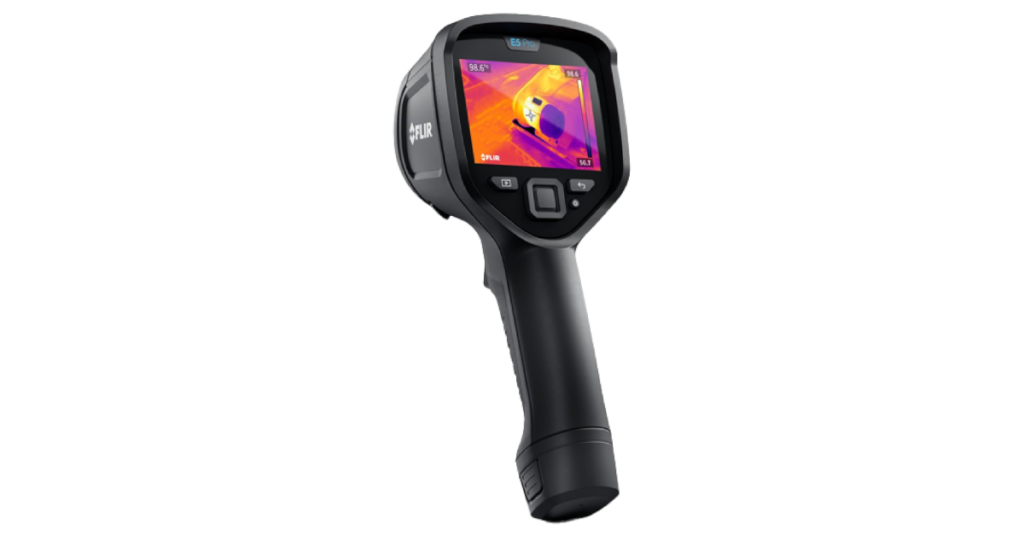
What the professionals use in cases like ours is an infra red Thermal Camera, Javier asked to buy the caemera a few years ago but they cost over €3000 then so may have been unaffordable, Now I have found the one we want to rent for €94!! – UPDATE: 24 mAY 2026 – I have now bought one for myself. It’s a much cheaper model but it will do the job.
here’s how it works:
Finding Hidden Damp with a Thermal Camera
You have an apartment with damp problems. You don’t know where the water is coming from or what needs fixing.
A thermal camera won’t fix the damp. But it can show you what your eyes can’t see – and that saves you from tearing open walls randomly.
How it works (the simple version)
A thermal camera sees heat, not light. Wet things are colder than dry things (because water evaporates and cools the surface). So damp patches show up as cold spots on the camera screen.
You walk around, point the camera at walls, ceilings, floors – and anywhere that looks like a cold patch, you’ve probably found damp.
What you can find with it
| Problem | What it looks like on the camera |
|---|---|
| A leaking pipe inside a wall | A cold, wet streak running down |
| Rain getting in through the roof | Cold patches spreading from the ceiling |
| Poor insulation causing condensation | Cold areas where moisture collects |
| Rising damp from the ground | A cold band near the bottom of walls |
How your community would actually use it
Step 1 – Buy or rent one
A good thermal camera (like the Flir iXX series) costs anywhere from €1,500 to €5,000. Or you can rent one for a week for a few hundred euros. (I found one that I can rent for €94 for 5 days all in.
Step 2 – Learn the basics in 30 minutes
You don’t need to be a technician. The newer cameras are app-guided. You point, shoot, and the camera helps you understand what you’re seeing.
Step 3 – Inspect systematically
One person walks through every apartment and common area (stairs, basement, garage, roof). Take photos of every cold spot.
Step 4 – Compare with real life
Ask residents: «Does this wall feel damp? Is there a stain here?» Match their answers with your thermal images.
Step 5 – Call a builder with evidence
Instead of saying «we have damp somewhere», you say «here are 12 photos showing exact cold spots in the north stairwell, ground floor, between 0.5m and 1.2m high». The builder then knows exactly where to dig.
A real example
Imagine Apartment 7 has black mould spreading on the bedroom wall for over a year. You’ve cleaned it, painted over it, and kept the windows open. Nothing works.
You point a thermal camera at the mouldy wall on a cold morning. On the screen, you don’t just see a cold patch. You see a bright blue streak running straight down from the ceiling to the floor, about 20cm wide.
That straight line tells you something important. This isn’t condensation. Condensation makes blotchy, irregular cold spots. A vertical line means water is flowing steadily behind the plaster.
You go upstairs to the apartment above. You point the camera at their bathroom floor. There it is – the same blue streak, coming from a leaking shower tray that has been dripping for years.
You’ve just found the source without breaking a single tile. The repair is now simple: fix the shower tray, let the wall dry, treat the mould one last time. No more guessing. No more wasted money
The honest truth about thermal cameras
What they DO do:
- ✅ Show you exactly where the cold (damp) spots are
- ✅ Save you from unnecessary demolition
- ✅ Help you prioritize which leaks to fix first
- ✅ Give you proof to show builders and insurers
If your apartment block is riddled with damp and you’ve been chasing your tail for years, a thermal camera is the tool that turns guessing into knowing. It won’t solve the damp by itself – but it will tell you where to start. And that’s half the battle.